
Step 1: Attach a Rubric to the Assignment
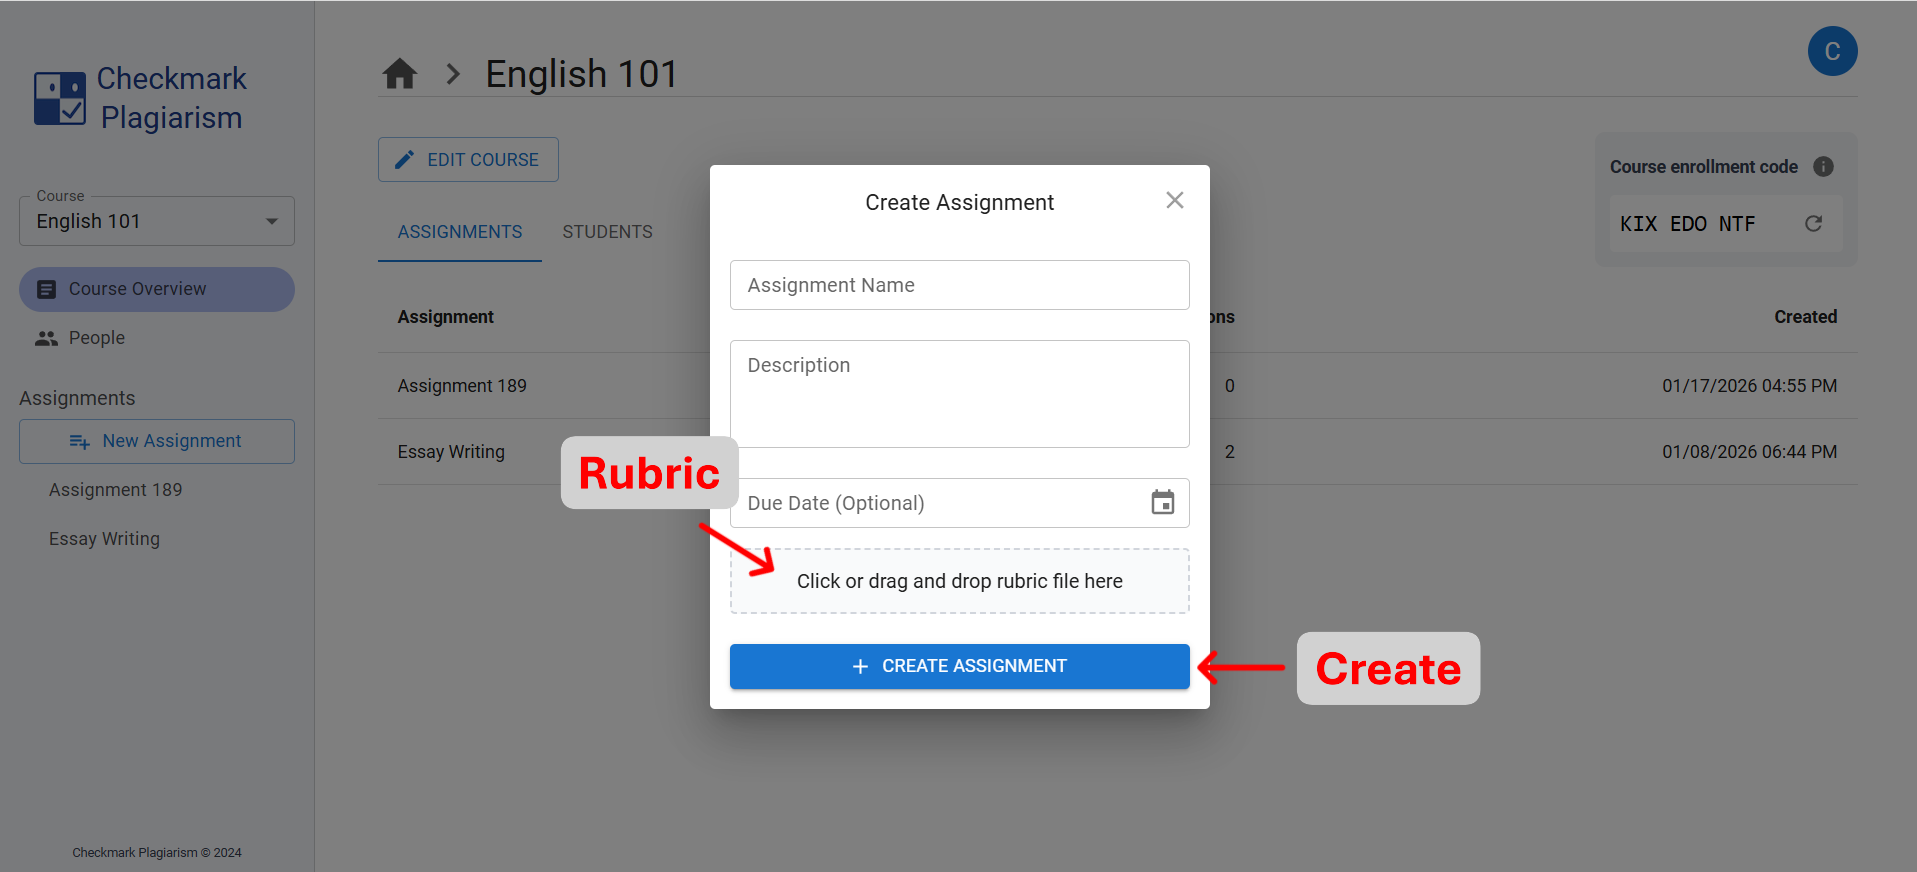
When you create or edit an assignment, add your grading criteria. Any rubric works - you don't have to rebuild what you already use.
Assignment Details & Rubric Upload
Build It
Use the rubric builder to define criteria and rating levels with live point totals - the same structure Canvas rubrics use.
Upload It
Drop in the rubric you already have - a document or even a photo of a paper rubric. Checkmark turns it into gradable criteria.
Reuse It
Your Rubrics Library keeps every rubric you've made - duplicate, edit, and attach across courses and assignments.
Using Canvas, Buzz, or Google Classroom?
Rubrics attached to synced assignments come along automatically - Buzz rubrics are even converted from their native format. You usually don't need to do anything here.
Step 2: Review Scores & Justifications
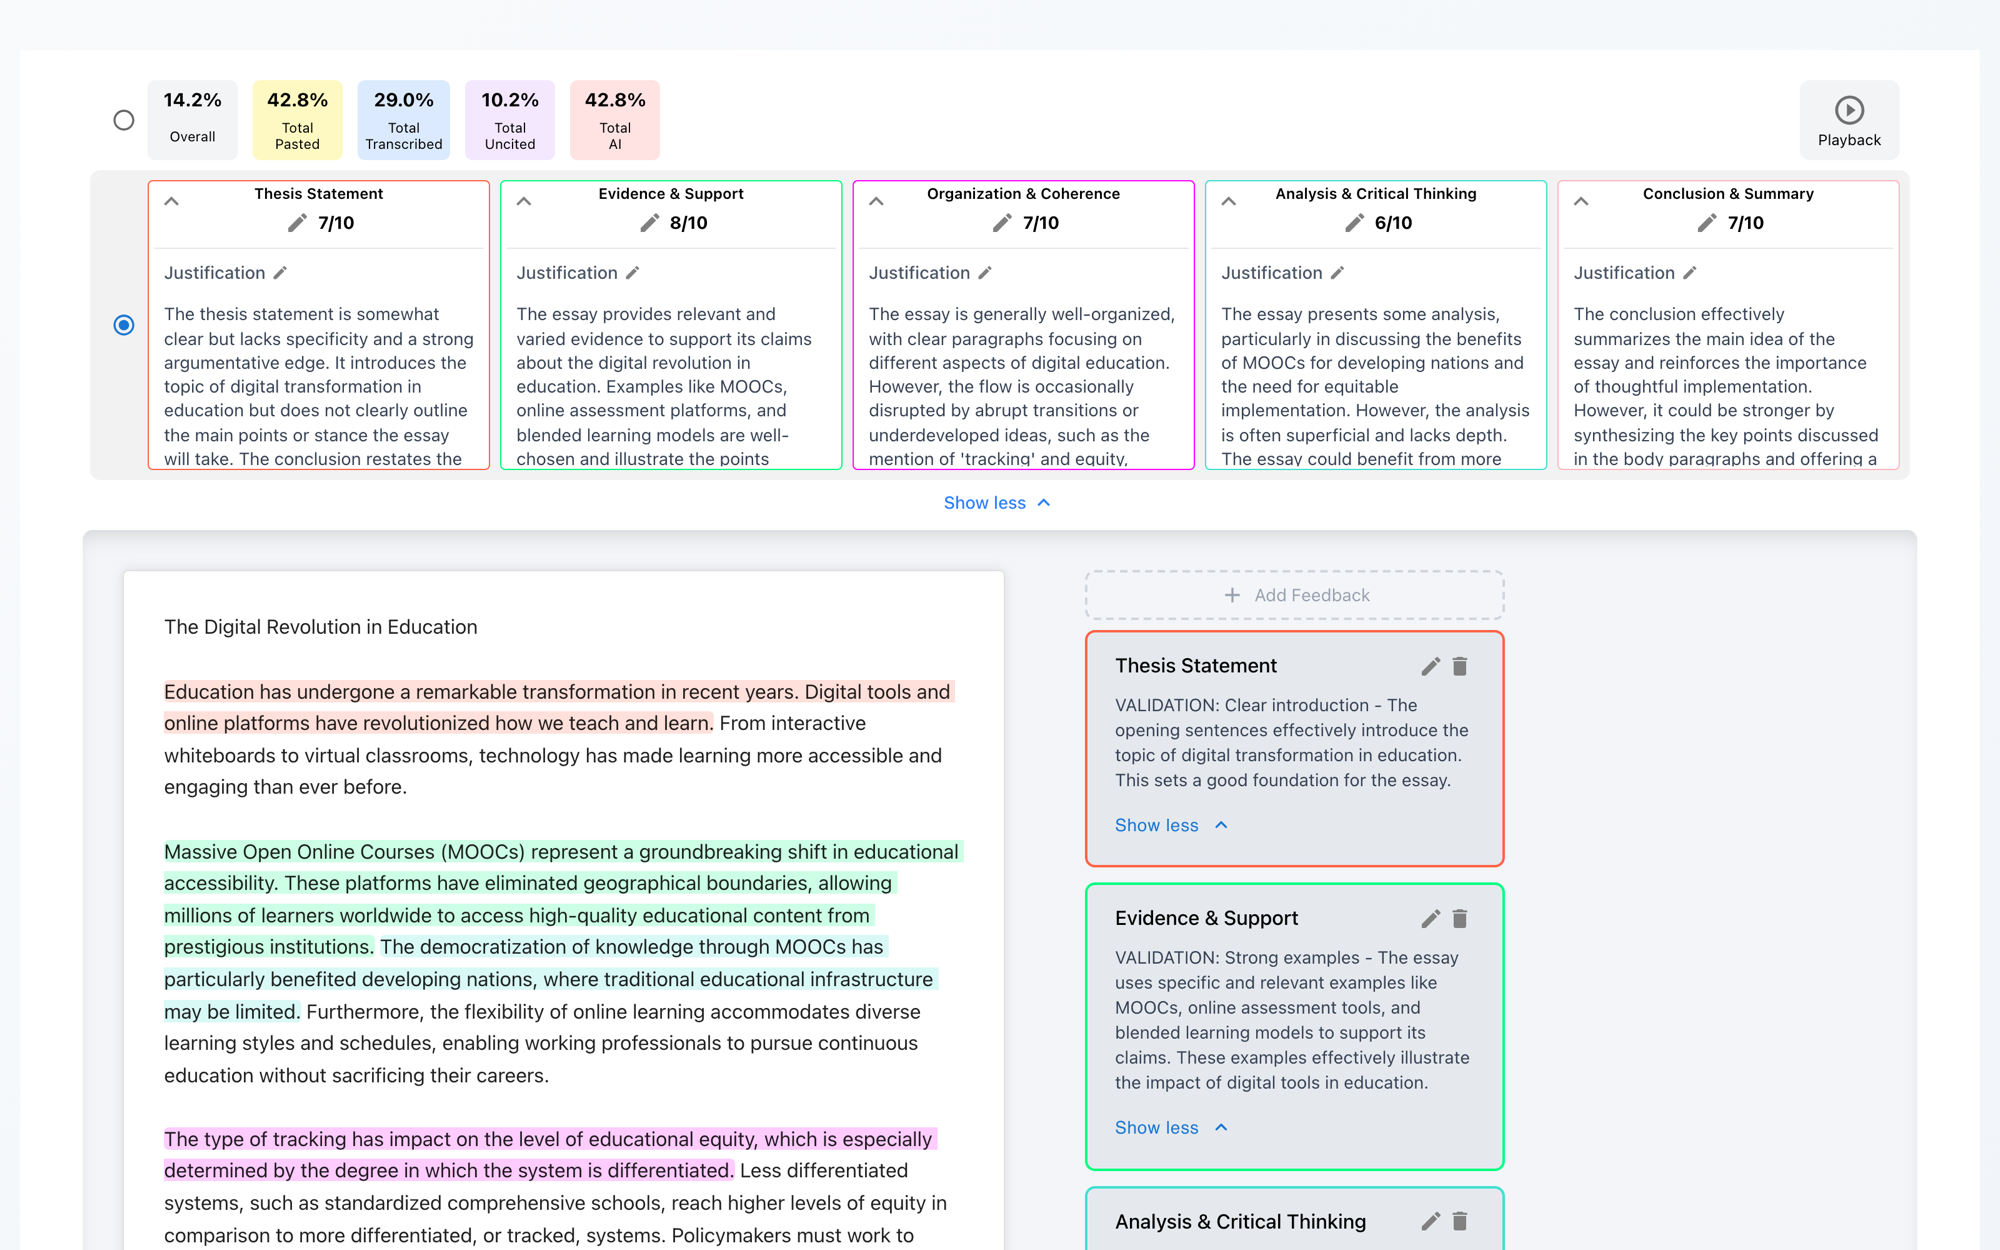
Open any analyzed submission and select the grading row of tiles. Each rubric category shows its score - expand it to read the justification, written against what the student actually wrote.
The Grading View
Pencil icons edit scores and justifications inline. Feedback cards highlight the exact quotes they refer to - select any text in the essay and click Add Feedback to leave your own.
Step 3: Publish - On Your Terms
Nothing is visible to students until you publish. When you're ready, the report's action button matches where the assignment lives.
Push to Canvas
Sends the score into SpeedGrader and publishes the feedback to the student.
Push to Buzz / Classroom
Buzz and Google Classroom assignments sync scores back to their gradebooks the same way.
Publish in Checkmark
For web-app assignments, Publish Scores snapshots exactly what you approved for students. Bulk-publish a whole assignment from its page.
See the Autograder in Action
The live demo grades a sample essay against a rubric - watch the justifications write themselves.